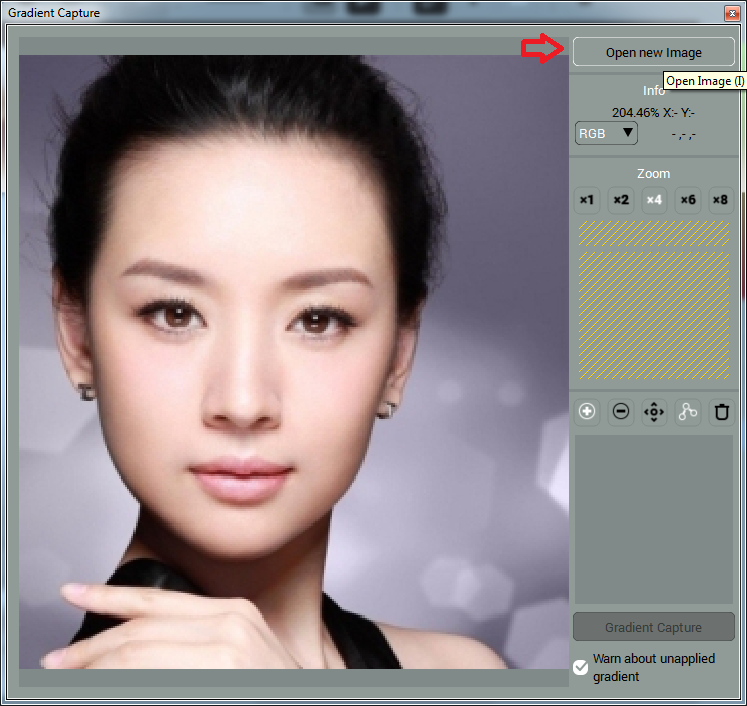
Gradient Capture
In some cases, it’s almost impossible to manually compose the right combination of natural colors for coloring faces with just intuition and color palette.
To help you cope with this complex task, we have designed an advanced Gradient Capture tool. It enables picking live gradients from the color photos, saving your time and letting you to forward your energy to coloring.
You can show/hide Gradient Capture tool using the button on the top of Gradient Settings.
Alternatively press “M”
Find the photo that, in your opinion, contains best matching colors. Open it in the Gradient Capture dialog (press “I” or Open Image Button).
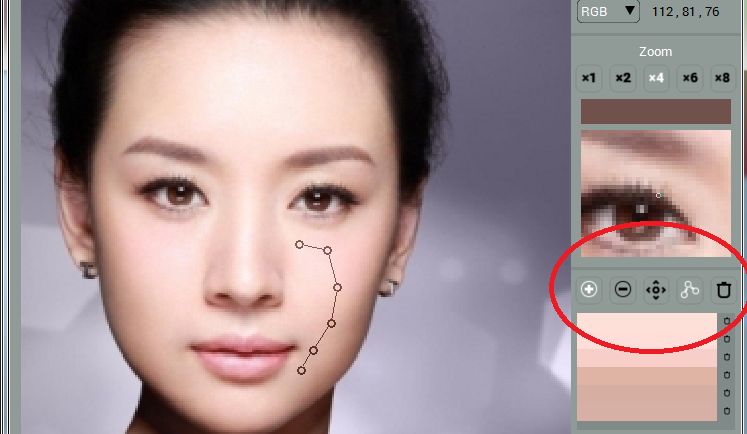
Once you see the photo in the main preview, hover the pointer over the area you wish to capture colors from. The zoomed area will appear in the Preview box to the right.
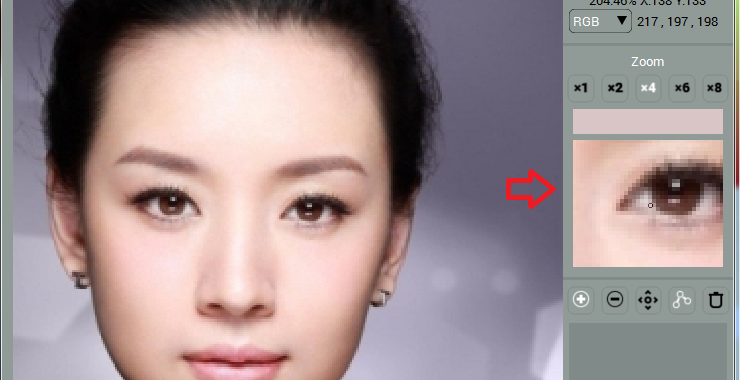
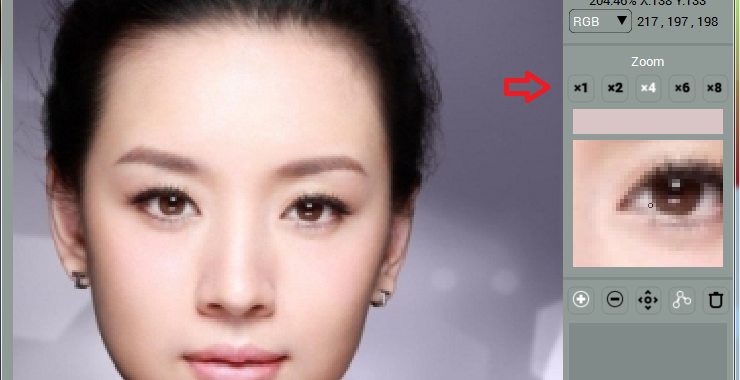
Set the Preview Zoom to the most comfortable value, so that you could easily point the pixels with best-matching colors.
Capture the color with a single click. It will appear in the Gradient Preview box. After you capture the second color, the Gradient Capture button will be activated.
Every pixel you’ve captured will be shown with the Pin. You will be able to manage operations with the Pins using the menu below Preview:
• switch between adding (press “1”) and deleting (press”2”)Pins,
• showing or hiding pins’ order (press “4”),
• enable moving single pins over to the different area (press “4”).
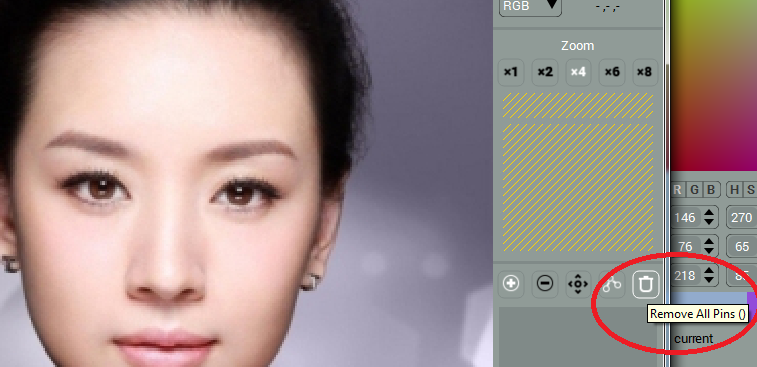
• delete all Pins (press”0”)
You will be able to delete colors from the Gradient in the Gradient Preview box using the buttons.
After you are done, click Gradient Capture button, close the dialog and draw a stroke with Gradient Pen.
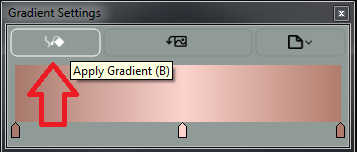
To apply gradient, click Apply Gradient button in the top left corner of Gradient Settings (or press “B”), otherwise, you will be able to change the gradient of the last stroke after you pick or compose the different Gradient.